Showing posts with label sew along. Show all posts

Sunday, January 19, 2014

Vogue 1241: final product

I just realized I never posted this! Along with many other posts, it got set aside because my computer was running really slow. You can expect a slew of posts now!

Here's the final product for the sew along this past fall: Vogue 1241
Dress front
Dress back
Ready for a wedding in my new dress
Dress in action

Sunday, October 20, 2013

Vogue 1241: sew along, day #8


Now it's time to hem your dress with a back vent. You can either follow the pattern instructions (which confused me) or just kinda wing it. I went with the second. To make the back vent, I pressed the back seam in one direction and made a little snip in the lining so it could come on the outside of the dress. Then I sewed narrow hems attaching the outside to the lining and top stitched the outside of the vent (sandwiching in where I snipped the lining) before actually hemming my dress. Note that if you do it this way, you'll have to make a pleat on one side of the lining as you hem. 

This probably all sounds very confusing (and it still is to me), so I hope my finished product pictures make sense to you.
Back vent, closed (note the topstitching)
Back vent - for the side on the right of the picture, I stitched a narrow hem on the outer fabric before folding it over and sewing it in place.
Back vent from the inside - for the side on the left of the picture, I just sewed a narrow hem and then sewed it in place.

Saturday, October 19, 2013

Vogue 1241: sew along, day #7


Today will be a hand sewing day. You need to hand sew a few things:
  1. Stitch below the zipper to connect the zipper to the back seam (see this post for more details - ignore the ruffle step for this dress).
  2. Hand sew the lining to the zipper. This is easiest if you baste the lining closed all the way to the neckline, press it flat, and then re-open that seam. You'll hand sew the fold to the zipper using a blind stitch (see this post for more details - ignore the ruffle step for this dress).
  3. Sew a hook and eye at the top of the zipper.
  4. Sew the front panels together to avoid wardrobe malfunctions (optional).
Now all that's left is the hem! Since this post came late, I'll post the final day of the sew along later this evening, and I'll post photos of the finished product tomorrow.
This is what the inside of your dress should look like after all your hand sewing. The zipper will be visible on the inside but not messy, and there will be no visible raw edges.
Here's what the hook and eye should look like when it is open. I clearly need to lint roller this...
Here is what the hook and eye should look like when closed. I clearly need to lint roller this...
And here's the zipper from the outside. You have to look closely to find it! That's a good thing, it's supposed to be invisible.

Wednesday, October 16, 2013

Vogue 1241: sew along, day #6


Today we'll put in the zipper and finish the back seam! Your dress is almost finished. As I mentioned in the end of yesterday's post, I went ahead and sewed the side seams before doing the back seam (step 28 in the pattern). I recommend you do the same. If you need to take your dress in or out bit, it sometimes works better to do so from the back than from the sides because the armholes won't grow or shrink in the process. That being said, for dart placement, etc. it can be better to take things in at the sides. Once you finish the back, you could still subsequently alter the sides. With this dress, I thought it would be difficult to alter at the sides because the gathered pieces are all at the sides, which makes it difficult to pin everything in place while wearing it (even thought there isn't any gathering at the side seam itself).

Try on your dress. This step should be in the pattern instructions, it's so important. Pin the back shut (it's easier to do this if you have help). Mark where the back seam/zipper should go to make the dress fit perfectly. For me, this meant a 1" seam at the top of the back (waist and above), and a less than normal 3/8" seam from my hips down. This corresponds to taking the dress in 3/4" up top and taking it out 1/4" on the bottom. Unfortunately, I got lazy and really only paid attention to the top 1" seam, so I took the dress in all the way to the bottom, resulting in a dress that fit way too tightly on my butt and legs. Once the zipper is in, you won't want to take it out to make changes! I ended up making my changes along the sides.

Unpin your dress and even out your markings. You can trim everything to a 5/8" seam if you're taking the dress in, or just remember to sew along the markings you made without worrying about the excess fabric.

Push the lining out of the way. If you stitched the back neckline all the way to the edge of the fabric, undo about 5/8" (or up to your markings) so the top of the zipper can line up with the top of the fabric.

Here, I've pushed the lining out of the way. My back neckline only goes to about an inch from the edge, so my zipper can reach the top of the fabric. The top of the zipper will ultimately be encased by that neckline seam. I saved the topstitching for last. In this photo, I've already started on the invisible zipper with the first step after ironing the zipper flat, pinning one side in place.

Tuesday, October 15, 2013

Vogue 1241: sew along, day #5


18. With right sides up, lap right upper front over left, matching centers. Baste.
If you followed my instructions and extended the base of the front panels, the width of the crossover shouldn't really change, but it could be too wide (if you extended it more than a little bit). If this happens, just chop off the pointy part to make it fit. Use the middle front panel (piece 9) to determine the correct width. Make sure you're overlapping at the center front.
Cross over the panels, matching center front. I did not extend the width of my panels when making this dress, so the points don't reach the opposite side. Your points could reach the opposite side, just make sure they don't extend the whole thing beyond the correct width. Baste them in place.
19. Pin LOWER FRONT (9) to lower edge of upper front... Pin lower front LINING to lower edge of upper front lining, right sides together... Baste between small circles. Stitch between circles, through all thicknesses.
I actually didn't baste the lower front to the upper front before adding the lower front lining. I just pinned carefully.
Pinned the center front panel. I actually didn't baste here, but I did do this before pinning on the lining panel behind it and then adjusting the pins.
Added the center front lining panel
This is what it looks like after sewing

Sunday, October 13, 2013

Vogue 1241: sew along, day #4

10. Stitch dart in UPPER FRONT LINING (6). Press fold of dart toward center.
You should be a pro at this by now! Just remember, when stitching a dart, always start at the wide part and sew all the way through the point (off the fabric). Your last few stitches should be right along the fold of the fabric. Then tie a knot at the point instead of backstitching.
Dart in lining
Dart pressed toward center
11. Staystitch...
This should be self-explanatory by now.

Saturday, October 12, 2013

Vogue 1241: sew along, day #3

5. To make dart in BACK (4), slash along solid line to square.
By slash, they just mean cut along the line. Don't cut out a wedge or anything.
5a. Staystitch back section closest to center, between upper small circle and armhole edge.
5b. Gather back section closest to the side seam, between upper small circle and middle circle.
Check out the photos under step 6 if this doesn't make sense yet. I didn't take pictures of the cutting, staystitching, and gathering since you just used those techniques yesterday.

6. Fold dart seam, right sides together, matching lower circles and solid lines, continuing to pin side back edges together, matching... Adjust gathers. Stitch... Press fold of dart and seam toward center.
When sewing this seam, the gathers might move around a little bit. To make your life easier, baste this seam, then check to make sure the gathers fall how you want them to, and then go back over with regular stitching.
In this picture, you can see where I adjusted the gathers and then sewed the seam. The dart is on the left side of this picture. There are markings on the pattern to indicate where to start angling toward the dart if it's not obvious.
Here's what the back looks like after you open it up and press. The center back is on the bottom of this picture.


7. Fuse BACK INTERFACING (5) to wrong side of back.
Again, I skipped the interfacing. It's up to you!

8. A note about reinforcing the back center seam at the bottom, where the slit will go.
I didn't do this. It really depends on your fabric and personal preference.

9. Stitch back to front at shoulders.
This should be self-explanatory, but here are some pictures for clarification.
Stitch shoulder seams
Shoulder seams open flat (this photo was actually taken at a later step... you might be able to see the lining peaking out a little under the outer fabric.

Friday, October 11, 2013

Vogue 1241: sew along day #2

Let's get to work! Today we'll assemble the upper front and side front pieces. Since these steps might involve some new skills for some of you, I'll stop there and pick up with the next steps tomorrow.

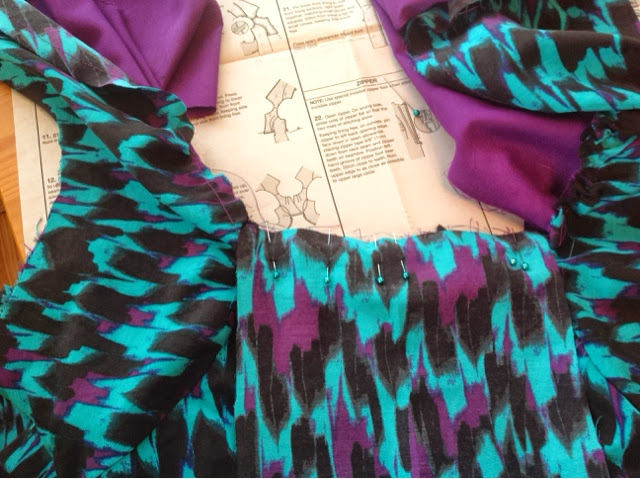
1. To make pleats in the UPPER FRONT (1) on outside, crease along lines of small circles. Bring creases to lines of large circles. Baste. Baste across upper edge. Press.
I don't really know what the first basting step is. I only basted once. See the photos below.
Fold the pleats along one line (marked with a small circle) and then adjust the fold so it rests along the line marked by the large circle. You'll be pointing your folds toward the center front when you fold them down. Pin them in place, and make sure the fold follows the line you traced onto the pattern.
After folding all your pleats, baste them in place. This means you should use the longest stitch your machine has to offer. I tend to baste about 3/8" away from the edge so I don't have to worry about the stitches showing/needing removal after I actually make a seam.

Thursday, October 10, 2013

Vogue 1241: sew along day #1

Today you should cut out your pattern pieces. I won't walk through the details of grainline, selvedges, etc. because you likely already know these things. If not, read through the last few sew alongs for links and details.

The fit of this dress is weird! Your measurements should tell you what your pattern size should be. My measurements put me around a size 10. Take a look at the finished pattern measurements (the circles with crosses in the middle on the tissue paper itself - for example, the finished bust measurement is on pattern piece 1). They are ENORMOUS (at least on the top half of your body) relative to your actual measurements. Because of this, I sized down to an 8 before cutting, and I also had to take the dress in about an inch in the back. Ultimately this was too much from my hips down, so I had to take it out at the sides along my legs. 


Do you see the circles with a cross in the middle? These list the finished garment measurements at the bust, waist, and hips. There is also a bottom finished measurement. Check them and compare to your actual measurements. You're most likely going to have way too much ease. Size down.

Monday, September 30, 2013

Vogue 1241 Sew Along Details


As promised by the end of September...

Let's start this one in about a week and a half - Thursday, October 10th. This pattern is not as hard as it might look, but it is a step above what I've presented before on this blog. The final product looks awesome! This time, I won't go through quite so many details (I'll assume you have more experience), so you should have made something wearable before (or just have a lot of confidence)! 

I would rate this pattern as easy-intermediate, with the last knit dress being very easy. The one complicated part of this pattern is just getting it to fit right. As you choose your fabric, I recommend picking out something with a little stretch. I didn't! If I make it again, I plan on using a stretch cotton or sateen, though.

So, go buy your fabric! Buy your fabric based on the fabric measurements listed for your size. REMEMBER, PATTERN SIZES ARE DIFFERENT THAN RETAIL SIZES! For comparison, my measurements put me between a 10-12 in pattern sizes. If you're between sizes, size down because this pattern does run large. 

Sunday, September 1, 2013

McCall's 6074-Summer Sew Along #2, Day #4


Note: this post comes a day early so some people who move at a faster pace can finish the dress. I posted day #3  earlier this morning.

Today we'll finish the dress! This involves hemming the armholes and the bottom of the dress. I found the instructions for the final hem unnecessarily complicated, and I'm not a fan of that type of hem either, so I hemmed it just like we've been hemming everything else on this dress: with a narrow hem.

If you're not caught up through step #8, visit day #1, day #2, and day #3 of this sew along first. We'll start at step #9.

9. For views A, B, D: Finish armhole edges of dress with a 5/8" narrow hem.

*If you're making the reversible variation of this dress, you should have already completed your armholes when you finished the "all in one facing," described here.

You already know how to do a narrow hem, but the armholes add a new level of complication. It is a fairly tight circle, which makes it difficult to stretch/not stretch the fabric as you go. It is more difficult to avoid bunching and to maintain the right amount of stretch under the arm. I'm not 100% pleased with my armhole, so I'll include some tips I thought of after the fact to make yours fit better.
Finished armhole. Mine isn't perfect, see below for tips!

McCall's 6074-Summer Sew Along #2, Day #3


Today, we'll put the gathering in the front of the dress, under the bust. This is pretty simple-you'll create a little casing for the elastic that you'll sew to the inside of the dress, and then you'll thread the elastic inside and secure it in place. We're starting at step #5 of the pattern instructions. If you're not up to that step, check out day #1 and day #2 of this sew along.

5. Press under 5/8" on long edges of CASING (3). Trim pressed-under edge to 3/8". Press under 5/8" on ends of casing. Trim pressed-under edge to 3/8".

*If you're doing the reversible variation, ignore this! You actually don't need this piece at all.

This is a really complicated way of saying you need to fold over all the edges of the fabric you cut out so there are no raw edges showing. I added an additional (optional) step here: I sewed the fabric in place so the raw edges couldn't accidentally pop out as I tried to manipulate this tiny piece. It's up to you whether you want to do this or not. It didn't add that much time and ensured a more polished looking final product.
Fold the edges and press them.
I sewed the edges in place to keep them
from moving in subsequent steps. 
The casing, with all its edges sewn in place. You don't
have to sew them down, but at least press them well.
6. Pin casing to front, wrong sides together, matching centers and having long edges along placement line. Edgestitch long edges of casing. Cut a piece of elastic 4.5" long.

Again, this sounds more complicated than it is. Remember how you traced the "stitching line" onto your fabric before you started sewing? Well it basically makes a box. Put your casing (piece #3 with the edges folded (and optionally stitched) in place) into this box. Pin it there so it fits perfectly. Sew close to the edge of the box on the long sides, using your stretch stitch.

*If you're doing the reversible variation, place the inner and outer dress fronts together, with the WRONG sides of the fabric together (so you're sewing on the side of the fabric you want to show). Find your stitching line markings on both and line them up perfectly. Stitch two lines (the long sides of the box you drew).

*If you're doing the maternity variation with extra gathering, your casing piece will be longer than the box you drew. That's good. Just center it. Cut your piece of elastic to 5" instead of 4.5".

Sew the casing to the dress front along the
long edges.

Saturday, August 31, 2013

McCall's 6074-Summer Sew Along #2, Day #2


Today we'll put together most of the dress! You should have already cut out your fabric, based on day #1 (click here) of this sew along. This is a quick sew because there are only 4 long seams, 2 shoulder seams, some hemming, and the gathering in front.  However, because you have to sew each seam twice, I think it takes more than an hour (the pattern envelope says one hour)! I'll split the sewing into four days, with today constituting the majority of the dress, tomorrow focusing on the front gathering, and Monday focusing on the hemming. I'll try to post both tomorrow and Monday's sew along instructions tomorrow in case you want to do it all at once.

I recommend that you glance over a few tutorials on sewing with knits. The pattern instructions recommend to stretch the fabric slightly while sewing. You want to retain the stretch of the fabric (if your stitching is tight, it won't stretch!), but I've found that if you stretch the fabric, the stitching looks bunched up. I have read quite a few tutorials and decided to hold the fabric taught but not stretched. It's very important to use a stretch stitch, though! If you use a regular stitch, then you'll lose the stretch of the fabric. On my sewing machine, the stretch stitch is #5. If you don't have a stretch stitch, I've read that a narrow zigzag stitch will do.

Check out these two helpful tutorials/descriptions of how to sew with knits: this one from Birch Fabrics and this one from Sew Mama Sew. I didn't do everything they suggested due to lack of supplies, but the general tips are very useful. I used a regular narrow needle (though one did snap into pieces at one point). I also didn't try to do the mock coverstitch thing (will come into play Monday) because I didn't have the special needles. I apologize that both examples focus on children's clothing! I guess there are just a lot of knit kids clothes.
The stretch stitch on my machine. The
number on yours will likely be different.
Look for the lightning bolt shaped stitch.
Remember, I'm following the instructions for view A! Some of the instructions in the actual pattern itself are mislabeled (for example, the sleeve instructions say they're for View C, when on the pattern envelope, View D has the sleeves). If you're making sleeves, it really doesn't matter which view you chose, just find the correct instructions! I am not providing sleeve instructions here.

I'm going to walk through the steps on the pattern instructions and include my own commentary and photo descriptions as we go. I'll also indicate what you'll do differently if you're making one of the two variations I listed (reversible or maternity). Before starting, read the "Sewing Information" on the front page of the pattern instructions, next to the pattern layouts. This defines words and diagrams the pattern instructions will use.

1. Stitch the outer seam of BACK (1) using a double-stitched seam. Press seam allowances to one side.

This means you're going to sew one 5/8" seam, and then afterwards, you'll sew another seam so the seam allowance can't roll and add bulk to your dress. I chose to make my second seam an overlock stitch. In theory, you could trim your seam allowance before starting and use ONLY an overlock stitch, but I felt more comfortable doing a regular stretch stitch first.

Here's where I probably added a LOT of time (but also made my final product look nicer): I pressed the FIRST seam open and then back together before sewing the seam allowance together! I did this because once you've sewn the second row of stitching, you can't get into that first seam with the iron to really make it lay flat. I use my standard pressing technique: press over the stitching, press the seam one way from the right side of the fabric, press the seam the other way from the wrong (visible seam) side of the fabric, and then finally press the seam open. Then I just pressed it flat again before sewing my second seam. This added a lot of time, so it's totally optional, but it looks nice.

I previously described the overlock stitch here.
Pin together the two back pieces, right sides
together. Remember to match up the piecs
using the notch you cut!

Friday, August 30, 2013

McCall's 6074-Summer Sew Along #2, Day #1


Today we'll prep the pattern and cut and mark the fabric. This dress should be really easy to sew. The biggest difficulty will be getting used to sewing knits. This pattern could be easily modified, so I'll include instructions for two simple variations (a reversible dress and a maternity dress) at the end of each day.

Here's what you should do today:


First, read through all the pattern instructions so you have a sense of what you're going to do and what each pattern piece corresponds to. Also, make sure you understand what the grainline, crossgrain, and selvedges are. If you don't, check out this previous post. Commercial patterns like this one include seam allowance, so you don't have to worry about that. I'm making View A, so I only need pattern pieces 1, 2, and 3.


Cut out your pattern pieces. Don't cut right on the line,
leave a nice inch or so for now. If you're making one of
the short versions (like View A), you can cut right along
the hem line for View A.
Save the bottom piece of pieces #1 and #2
(the front and back). Make sure to label
them clearly! You'll want these pieces in the
future if you choose to make a different
style of the same dress.
Iron the tissue paper pattern pieces. Use low heat, no steam.
It's best to use a dry iron (no water inside) so you don't
accidentally get the tissue paper wet. You want your
pattern to be flat-a big wrinkle could change the size of
the pattern piece.

Thursday, August 29, 2013

Slight delay in Summer Sew Along number 2


I decided to wait to post the first day of this sew along to tomorrow in order to have the main sewing days posted over the weekend. I don't think the fabric prep and initial sewing will take two days!

Check back tomorrow, early afternoon, for day #1 of the new sew along!

Thursday, August 22, 2013

Summer Sew Along #2: McCall's 6074

McCall's 6074, click the picture to purchase online
As promised, I'll start this second sew along soon (the end of August, 2013). I plan for Day #1 of the sew along to be a week from today (Thursday, August 29th). Like last time, I'll have you spend a day or so cutting and pinning with minimal sewing, and then I'll feature the bulk of the sewing over the weekend.

This pattern is VERY EASY. The most difficult aspect is that it uses knit fabric, which can misbehave while sewing and cutting.

I'll walk you through how to follow a commercial pattern-what different marks mean, what certain instructions mean, etc. Don't feel intimidated if you've never followed one before!

There is no zipper, so all you need for this pattern is the correct amount of fabric (calculate your size based on measurements, and then purchase your fabric accordingly). This pattern calls for a stretch knit fabrics, like jersey. You should pre-wash your fabric as you would wash the future garment. Most jersey knits, etc., can go in the dryer, but they might shrink, so make sure to do this before any cutting!

You'll also need matching thread and 1/4 yard of 1/2" elastic. The elastic goes in the center front under the bust where the dress is gathered.

There is a current pattern sale on the McCall's website through today (August 22nd, 2013), so if you haven't purchased the pattern yet, order it!

At this point, just make sure you have your pattern, fabric, thread, and elastic, and wash and dry the fabric before next Thursday when we'll start.

Tuesday, August 6, 2013

Easy breezy skirt, day #7


This is the last of seven days of a sew along in which we created a pattern based on measurements and turned it into a cute skirt. Here's the info on the sew along, and here's the first day. If you've been following along from the beginning, day #7 is Wednesday, August 7th.

Today's an easy day. Hem your skirt and put it on! Make sure you hung the skirt for a while (preferably overnight) before hemming.

I used a rolled hem for my skirt. You could choose a different type of hem if you know one. For a light, flowy, fabric I prefer a rolled hem. I purchased a rolled hem foot for my bridesmaid dresses, and I love it!

Before hemming, try on your skirt and cut it to be the desired length plus the hem allowance. I've found that when using a rolled hem foot, you lose ~1/4-3/8" in the hem. If you're going to do a narrow hem without a rolled hem foot, it might cost you a little more. Look through these tutorials to figure out how much excess to leave. If you don't have a rolled hem foot, hemming will involve folding and sewing once, then trimming the excess before folding and sewing again. There's no trimming step after you start sewing when you use a rolled hem foot.
Easy breezy skirt sew along, day #7 | Bobbins of Basil #easybreezyskirt
Trim your skirt to the desired length.
Easy breezy skirt sew along, day #7 | Bobbins of Basil #easybreezyskirt
Make sure the skirt is even. Trim for fit and for evenness.
Sometimes fabric will stretch a little along the bias, which
is why you hung the skirt overnight before hemming.

Monday, August 5, 2013

Easy breezy skirt, day #6


We'll finish the whole skirt except the hem today! This is important—hang your skirt overnight before hemming. Don't finish the skirt today unless you're really in a rush to wear it.

Today will primarily be a hand sewing day. There are two parts of the skirt you need to hand sew: you need to sew the waistband lining to the waistband/zipper, and you need to close up the gap below the zipper.

Before we start hand sewing, finish the top waistband seam above the zipper:
Easy breezy skirt sew along, day #6 | Bobbins of Basil #easybreezyskirt
Sew all the way to the edge along the white
dotted lines in the picture. Do this on both
sides.
Next, prepare to hand sew the waistband lining in place. If you didn't do it yesterday, press the raw edges of the waistband under 5/8".

Sunday, August 4, 2013

Easy breezy skirt, day #5


I'm posting this a little early in case anyone wants to do it tonight!

Today we'll put the zipper in on the right side of the skirt. When you put the zipper in, don't catch the lining; keep it loose. You'll hand sew that down tomorrow.

I won't reinvent the wheel here. There are a lot of good invisible zipper tutorials available online, and I've made a step by step video for the coffee date dress sew along that you can view here. I would recommend following this invisible zipper tutorial from sewiknit.blogspot.com. Consult this tutorial and watch my video, and then follow the steps below:
Easy breezy skirt sew along, day #5 | Bobbins of Basil #easybreezyskirt
Iron the zipper teeth flat.
Easy breezy skirt sew along, day #5 | Bobbins of Basil #easybreezyskirt
Pin the zipper in place. The top of the
zipper should reach the top of the fabric
(and will ultimately be encased by the top
seam). Treat the bow piece as part of the
waistband (just let it fold back on the
back of the waistband).

Easy breezy sew along, day #4


Don't forget to use #easybreezyskirt if you're sharing photos of your creation!

This will be a fairly short day. I'll also post the next day (Monday, August 5th) a little later this afternoon so you can speed up the pace if you want. I made day #3 (Saturday, August 3rd) the longest day, and each other day should only be ~30-45 minutes of work for a beginner.

Before you start anything today, mark the middle of each skirt piece at the top (the narrower end). Make sure you can still see your markings on the waistband pieces (darken them up if they've faded).

You should have two skirt pieces, one front and one back. They're really the same exact pieces (each is 1/4 of a circle). Decide which side you want to be the front and which side you want to be the back. If you have a solid fabric, then it really shouldn't matter. If you have a print, it might matter to you.

Place the skirt pieces on top of each other, right sides together, with the front piece underneath the back. Then:
Easy breezy skirt sew along, day #4 | Bobbins of Basil
Pin along the right side (so when you open up the seam it
will be on the left side). The front piece is under the back.
Easy breezy skirt sew along, day #4 | Bobbins of Basil
An alternate view: pin along the right side. Sew along this
seam (where the pins are) with a 5/8" seam allowance.
Press this seam open.
Easy breezy skirt sew along, day #4 | Bobbins of Basil
Lay the waistband out flat, right side up, with the bow
pieces closer to you.